A ‘Best Principles’ Cold Roof Assembly
This past winter, we built a large, freestanding, two-bay garage. The footprint of the building is 26 feet by 32 feet, and the entire structure is finished inside, including a second-floor home office. Total finished space is approximately 1,500 square feet. The second-floor office is heated and cooled with a ductless mini-split.
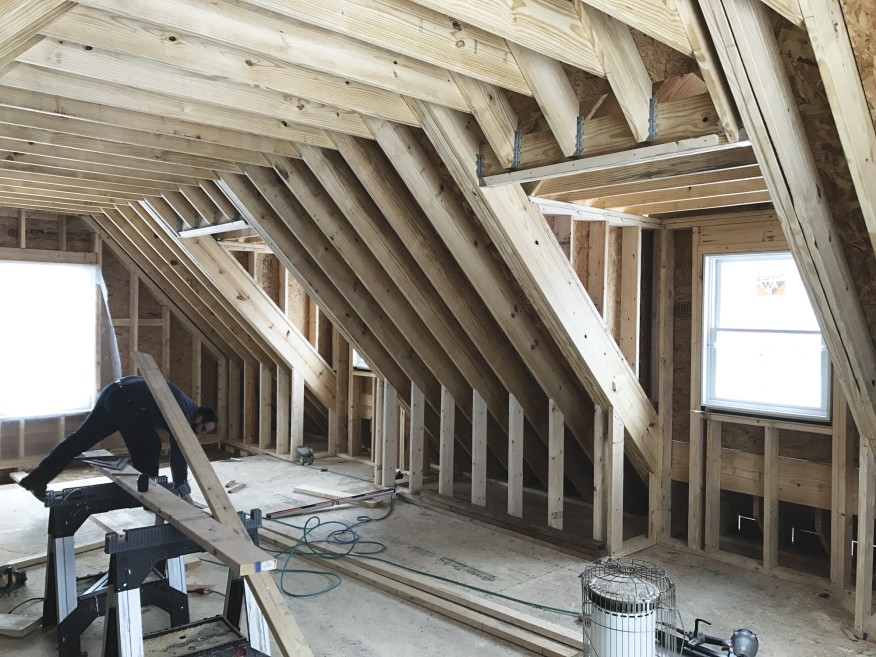
With a straight gabled roof profile constructed using 2×12 dimensional lumber, the second-floor office has large sections of cathedral ceiling, where the finished drywall is directly under the roof rafters. These sections of framing can be tricky to insulate and air-seal (see “A ‘Never Worry Again’ Insulated Ceiling,” here and on JLC, Jan/19). In consultation with the architect for the garage, we decided to use 7 inches of closed-cell spray foam to insulate this rafter space.
The properties of closed-cell spray foam made using it a no-brainer. It is an excellent thermal barrier, with an R-value of approximately 6.5 per inch. Closed-cell also has first-rate characteristics of being air- and vapor-impermeable. This makes it a great form of insulation in our neck of the woods (climate zone 5). Spraying 7 inches of closed-cell would yield an approximate finished R-value of 45.5.
The Hot-Roof Option
The most typical installation of spray foam in a rafter cavity is when it is applied directly to the underside of the roof deck. This leaves no ventilation for the roof sheathing and is commonly referred to as a “hot roof” by architects and builders. Because closed-cell spray foam is a vapor and air barrier, the theory is that air and water vapor will never make their way to the roof sheathing, thereby eliminating the need for a vented roof section. The problem with a hot roof assembly is that it relies on a perfect installation of the two-part insulation foam. However, any number of factors could potentially create a loss of integrity in the system, including, but not limited to, the following:
- Improper temperature of the substrate that is being sprayed with insulation (in this case the underside of the roof deck)
- Improper temperature of the spray-foam chemical parts
- A substrate that is not free of moisture (factors include changing humidity and atmospheric conditions on a jobsite and framing lumber that didn’t adequately dry after being exposed to rain)
- Improper technique by the person actually performing the foam installation.
Furthermore, a hot roof assembly also relies on the premise that the framing lumber will never shrink, twist, or otherwise change its shape. If this phenomenon occurs, there is a potential for micro-channels to form. In winter months, these channels can allow warm, moist air to make its way through the assembly and condense on the underside of the roof sheathing. For this reason, a good air-control layer is important and needs to be in place, inboard of the insulation.
So what does the long-range forecast look like when you’re constructing a hot roof? What happens if spray foam isn’t installed properly? What if it is installed properly but there are conditions out of control that create a failure? What are the consequences?
I have read articles about hot-roof spray-foam failures and seen these failures in person, with consequences including rotten roof sheathing, mold, and in some cases, extensive condensation damage to drywall. It’s ugly, it’s expensive to remedy, and it’s potentially avoidable—if the roof can be ventilated.
Our Approach: A Cold Roof Assembly
With images of these failures vivid in my mind, I try to avoid hot roofs. Instead, I like to build a fully vented roof assembly that is insulated with closed-cell spray foam. This roof assembly is often referred to as a “cold roof” and is the antithesis of a hot roof. With two strategies employed (the airtight, vapor-impermeable foam, plus the ventilation as a safety valve), you might call this a “belt and suspenders” approach to building. A cold roof assembly can also be created using other types of insulation.
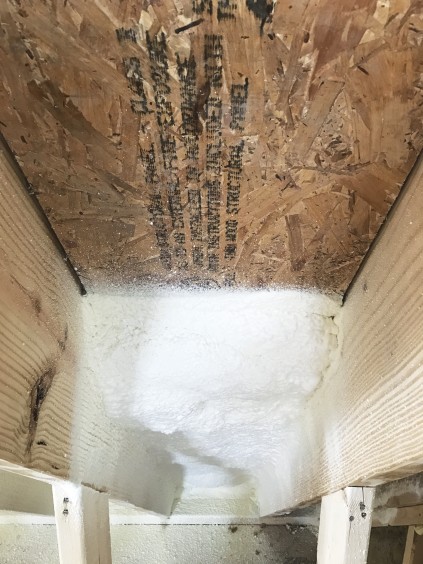
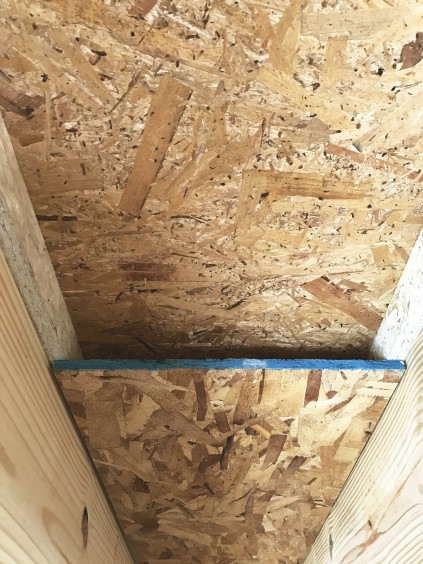
Spray foam is applied to the underside of the vent channel. If there are imperfections in the spray-foam application, the vent provides backup to clear any moisture.
The primary goal here is to avoid trapping moisture under the roof deck. The second and nearly as important goal is to keep the roof deck as cold as possible during upstate New York winter months. Cold roof sheathing is one of many components in keeping ice dams at bay. To create a cold roof, we provide each rafter bay with a full-width vent chute that leaves a 1 1/2-inch air channel under the roof deck. This provides for ample airflow. It is important when building this assembly to ensure that we have proper soffit intake, as well as ridge venting for exhaust, as specified in the building code. If the spray foam was applied improperly, or there is any future movement of the framing lumber, we still have a fully vented rafter assembly. Any vapor that potentially makes its way through the insulation layer can escape through the vent chute.
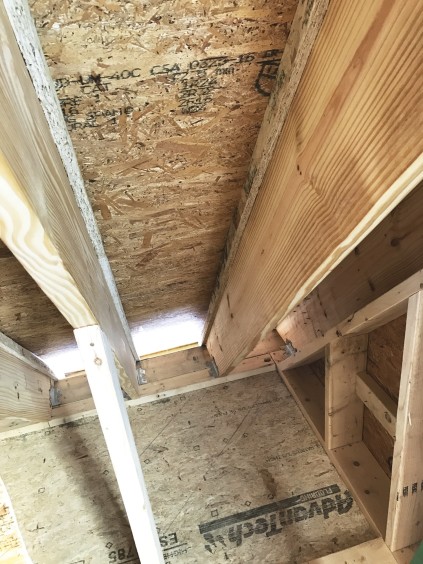
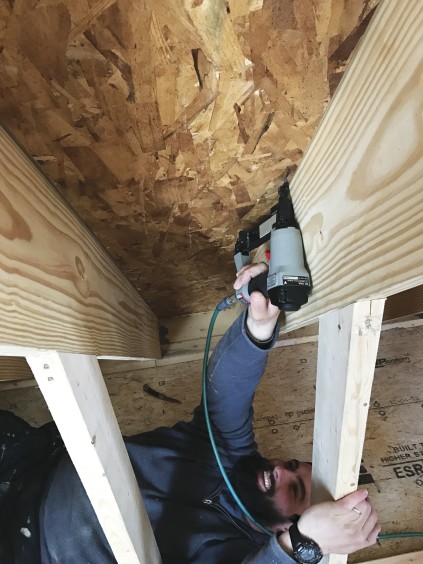
The design and the installation process of the cold-roof components for this project were simple (see photos).
First, we ripped and installed 3/4-by-1 1/2-inch OSB furring strips up against the underside of the roof deck, stapled to the top edge of the rafters with 18-gauge crown staples. We used cutoffs of the OSB subfloor as well as other 3/4-inch commodity OSB materials.
Next, we covered the furring strips with 7/16-inch commodity OSB to create a vent chute. We also fastened the OSB panels with crown staples, about 6 to 8 inches on-center.
Finally, the spray-foam installer applied closed-cell spray foam directly under the OSB chute in 2-inch lifts.
In preparation for the spray-foam installation, I needed to ensure a few extra things. We chose to run parts of the ductless mini-split line set partially in a rafter space. We knew this line set would come in contact with the spray foam, but we didn’t have a good grasp of how the line set would withstand the high heat of the spray foam. The spray foam comes off the installation gun at approximately 130°F to 140°F. Then the foam components chemically combine in an exothermic reaction that releases heat, so the foam elevates in temperature by about another 10 or so degrees after it’s been applied.
I have an excellent relationship with our spray-foam contractor, and he was willing to do a little bit of testing for us while he was getting set up to insulate the garage rafter sections. He test sprayed a cutoff of the line set and weep hose from the ductless mini-split. I also wanted to see how a traditional polystyrene insulation baffle might perform, so we took the opportunity to spray and test that as well. We could glean information from the test that might be valuable on future jobs.
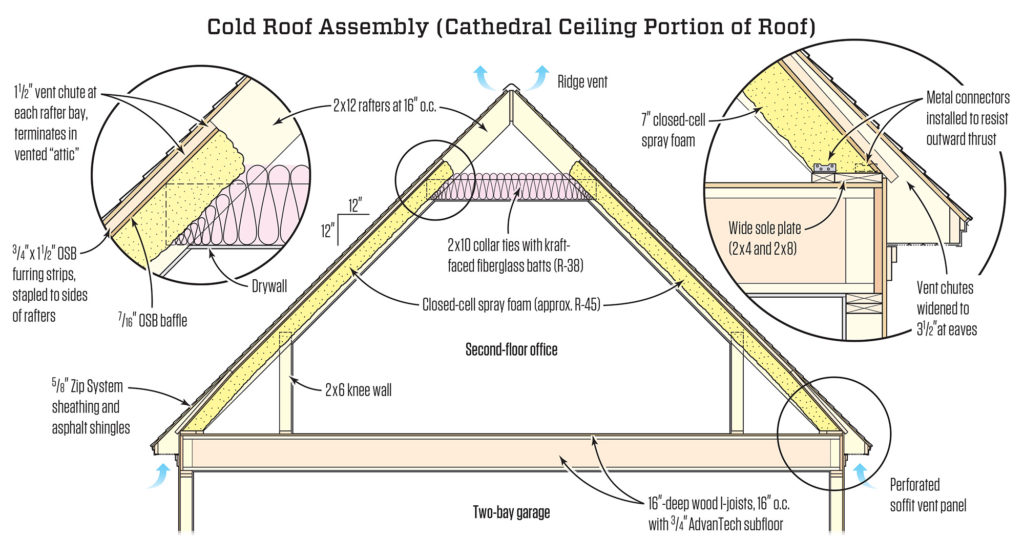
Diagram by JLC, Tim Healey
The results of the testing definitely quelled our fears about the heat of the spray foam and gave me the confidence to have him continue with the insulation job as planned, including spraying directly on the mini-split line set.
Best Practices vs. Best Principles
For years, when reading trade magazines, attending trade shows, watching videos on YouTube, and most recently, viewing endless content on Instagram, I have seen the construction industry use the term “best practices.” The term typically refers to the superior way to build or install a specific product or fixture. In reality, there aren’t best practices—there are only “best principles.” “Best practices” assumes that we have unhindered budgets as well as access to the best building materials, subcontractors, skill, knowledge, and perfect conditions to build. In the real world, budgets, conditions, and client goals vary from job to job. Our role is to apply the best principles to these variable contexts.
Many architects, designers, and contractors consider a hot roof to be the best practice for insulating a roof section. But, like anything, spray foam insulation has limitations, and I’m not comfortable installing a hot roof. Based on my practical knowledge, experience, and a bit of intuition, I’d like to think that the cold roof is a manifestation of some of my best principles:
- Controlling what I can
- Engaging my subcontractors
- Mitigating risk
- Setting expectations for customers
- Keeping my reputation intact.
As contractors, it’s important to acknowledge “we know what we don’t know.” But we do know what we can control.
ABOUT THE AUTHOR
Jeremy Kassel is the owner/operator of Kassel Construction in Glenmont, NY, as well as the co-host of the House Calls Podcast.
He can be found on instagram at @kasselconstruction.
This article was also featured in the Journal of Light Construction, in print and online in August 2019
